Enabling Full Disk Encryption on your device can decrease the likelihood of unauthorized access in the event that the device is lost or stolen. Both macOS and Windows provide Full Disk Encryption capabilities in the Operating System by default.
**Important Note**: Each Operating System will provide a Recovery Key or Recovery Phrase. It is very important to ensure the Recovery Key or Recovery Phrase is generated and kept somewhere secure off of your computer. The Recovery Key or Recovery Phrase is used in the event that your primary password is lost or your computer experiences a problem that requires the Recovery Key or Recovery Phrase be provided. NU ITS does not have access to this key or phrase for personal devices. Data loss can occur if the Recovery Key or Recovery Phrase is lost - please ensure it is both generated and kept somewhere secure off of your computer.
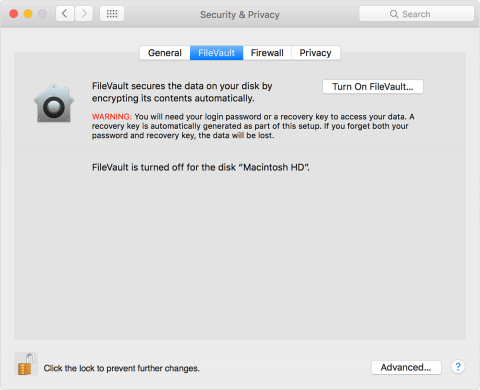
macOS Instructions:
FileVault 2 is available in OS X Lion or later. When FileVault is turned on, your Mac always requires that you log in with your account password.
- Choose Apple menu () > System Preferences, then click Security & Privacy.
- Click the FileVault tab.
- Click the lock in the bottom left corner, then enter an administrator name and password.
- Click Turn On FileVault.
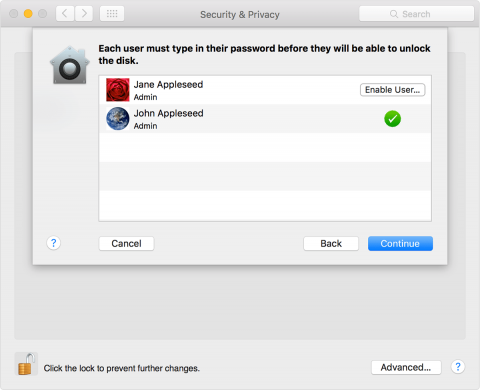
If there are additional user accounts on your Mac, you may see a message asking to enable additional users. Each additional user account requiring access to unlock the FileVault encryption must type in their password before they are able to unlock the disk.
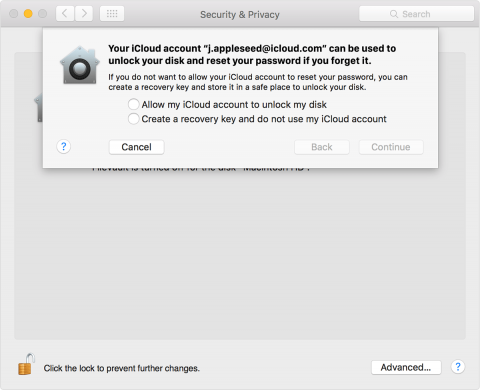
You will be asked to create a recovery key in case you forget your password. It's important to ensure a recovery exists in a secure location for your FileVault encrypted Mac. If you lose both your account password and FileVault recovery key, you won't be able to log in to your Mac or access the data on your startup disk.
If you don't want to use iCloud FileVault recovery, you can create a local recovery key. Keep the letters and numbers of the key somewhere safe—other than on your encrypted startup disk.
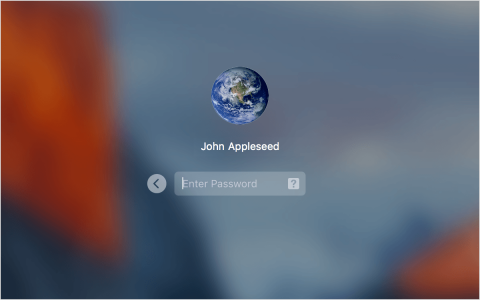
When FileVault setup is complete and you restart your Mac, you will use your account password to unlock your disk and allow your Mac to finish starting up. FileVault requires that you log in every time your Mac starts up, and no account is permitted to log in automatically.
Additional information and troubleshooting for FileVault encryption on macOS can be found on Apple's FileVault Support Page.
Windows Instructions:
Device Encryption is available on Windows 10 and 11 for devices that support encryption. You can verify that your device supports encryption by following the steps below.
Verify your device supports encryption
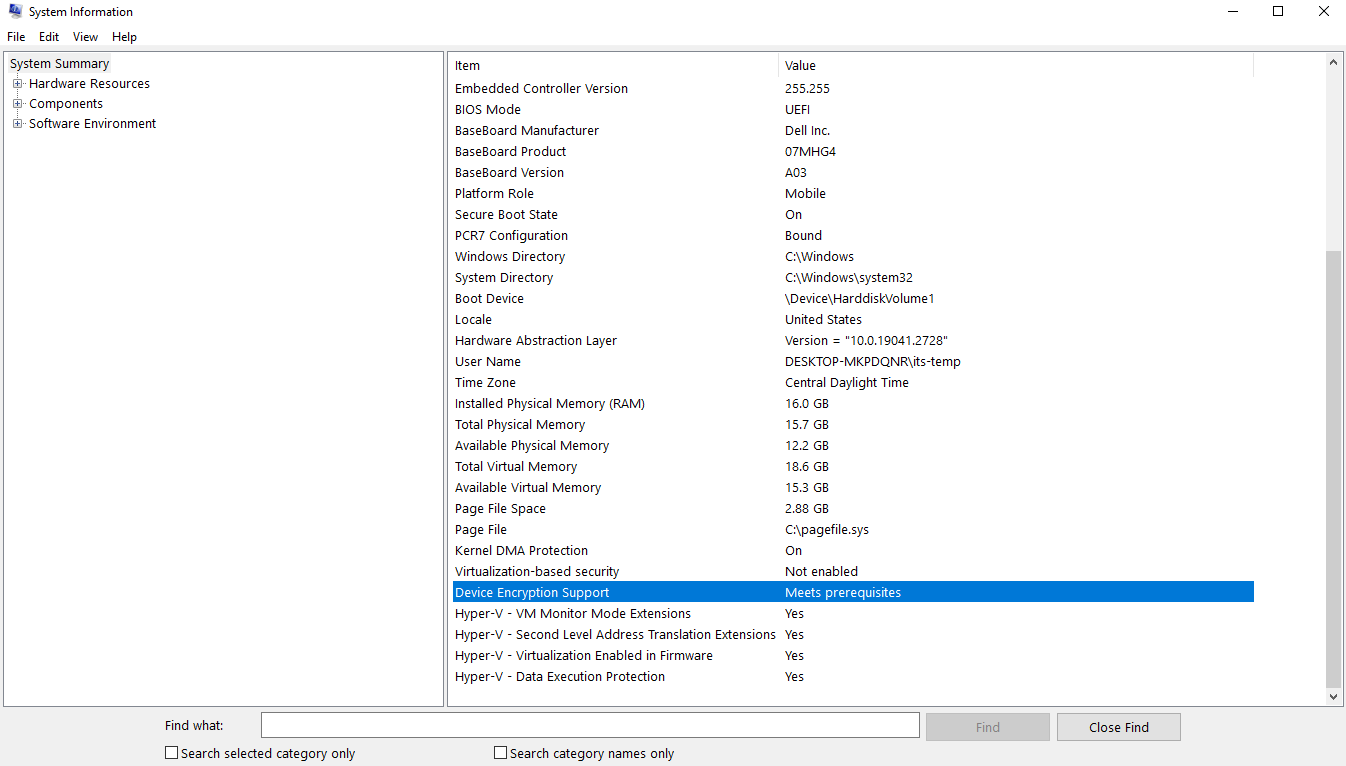
- In the search box on the taskbar, type System Information, right-click System Information in the list of results, then select Run as administrator.
- At the bottom of the System Information window, find Device Encryption Support. If the value says Meets prerequisites, then device encryption is available on your device.
Turn on device encryption
Windows 11
- Sign in to Windows with an administrator account.
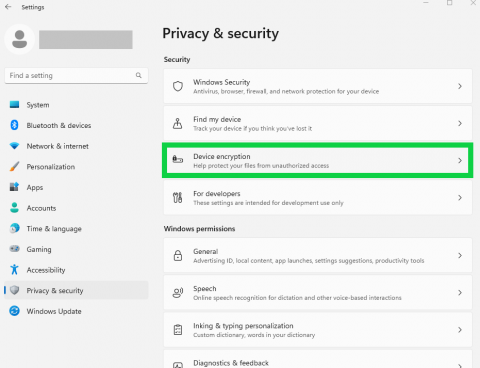
- Select the Start button, then select Settings > Privacy & Security > Device encryption. If you receive a message indicating that "You need a Microsoft account to finish encrypting this device" or Device encryption doesn't appear, you may be able to use standard BitLocker encryption instead. Otherwise, continue with Step 3.
-
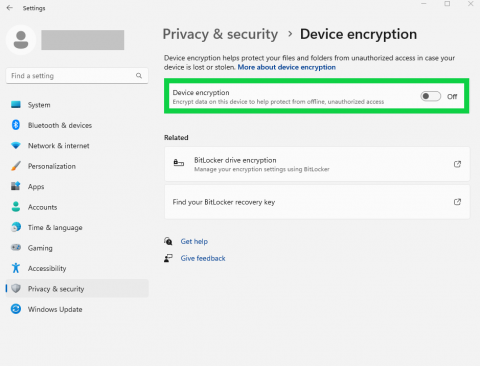
If device encryption is turned off, select Turn on.
-
Your device will begin encrypting. This process may take some time depending on the age of your device.
- Once your device has finished encrypting, a "recovery key" will be automatically created for you in your Microsoft Account. It's important to ensure the recovery key exists in your Microsoft Account - it is used to regain access to your device's data in the event your device experiences a problem. The "recovery key" can be found by following the steps at: Finding your recovery key in Windows.
Windows 10
- Sign in to Windows with an administrator account.
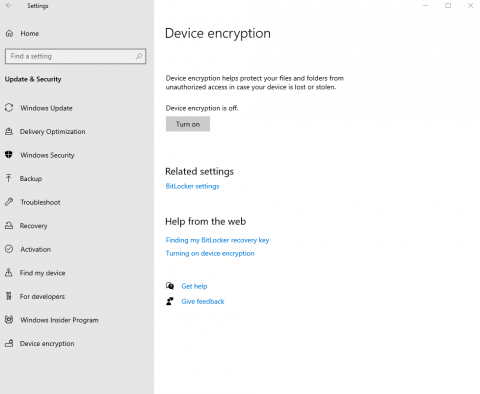
- Select the Start button, then select Settings > Update & Security > Device encryption. If you receive a message indicating that "You need a Microsoft account to finish encrypting this device" or Device Encryption doesn't appear, you may be able to use standard BitLocker encryption instead. Otherwise, continue with Step 3.
- If device encryption is turned off, select Turn on.
-
Your device will begin encrypting. This process may take some time depending on the age of your device.
- Once your device has finished encrypting, a "recovery key" will be automatically created for you in your Microsoft Account. It's important to ensure the recovery key exists in your Microsoft Account - it is used to regain access to your device's data in the event your device experiences a problem. The "recovery key" can be found by following the steps at: Finding your recovery key in Windows.
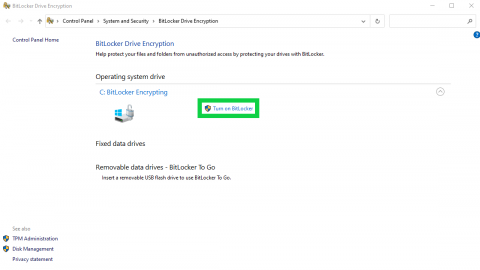
Turn on standard BitLocker encryption
The steps below can be used if your Windows device does not support or is not able to use the device encryption settings as described in the "Turn on device encryption" section and your computer is running Windows 11 Pro or Windows 10 Pro. If you were able to complete the device encryption process as described above, the steps below should be skipped.
Windows 11 Pro and Windows 10 Pro
- Sign into your Windows device with an administrator account.
- The location of the Manage BitLocker setting in Windows varies slightly between Windows 11 and Windows 10.
On Windows 11 - In the search box on the taskbar, type Manage BitLocker and then select it from the list of results. Or, select Start > Settings > Privacy & security > Device encryption > BitLocker drive encryption. Note: You'll only see this option if BitLocker is available for your device.
On Windows 10 - In the search box on the taskbar, type Manage BitLocker and then select it from the list of results. Or select the Start button, and then under Windows System, select Control Panel. In Control Panel, select System and Security, and then under BitLocker Drive Encryption, select Manage BitLocker. Note: You'll only see this option if BitLocker is available for your device.
- Select Turn on BitLocker.
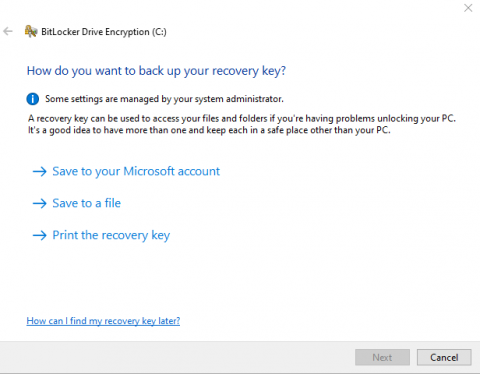
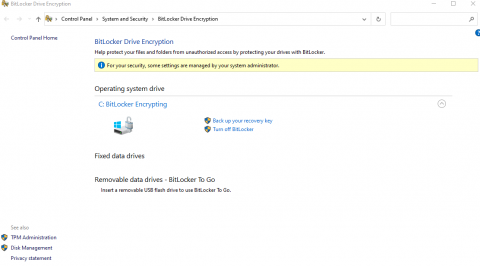
- You will be asked how you'd like to back up your "recovery key". It's important to ensure the recovery key is backed up to your Microsoft Account, saved to a file location off of your device (such as a USB drive), or printed and kept in a secure location. The "recovery key" is used to regain access to your device's data in the event your device experiences a problem.
-
Once your "recovery key" has been backed up, press "next" and choose "Activate BitLocker".
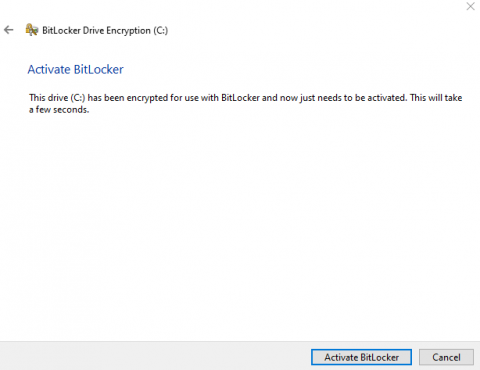
-
Your device will begin encrypting. This process may take some time depending on the age of your device.
Linux Instructions:
LUKS, short for Linux Unified Key Setup, is a standard hard drive encryption technology for major Linux systems including Ubuntu. It is used for encrypting entire block devices and is therefore ideal for encrypting hard disk drives, SSDs, and even removable storage drives.
Encryption on the logical Volume Manager (LVM) work together with LUKS to encrypt.
Encryption during the installation of the operating system. The GUI walk through will assist.
Enable disk encryption after installation of the operating system is a difficult answer to pin down. LUKS along with the utilities that work together to encrypt require they create the partition then the filesystem or LVM on top of the volume. Rather than the whole hard drive, you can choose to encrypt the home directory of your user. The following steps will help a user folder encryption and can be used to encrypt a secondary drive but not the main system hard drive.
Two packages must be installed. Use the prefer package manager to complete the install. Install ecryptfs-utils and cryptsetup.
~$ sudo apt-get install ecryptfs-utils cryptsetup
Logout of the user account that is being targeted for encryption. You can create an additional user account if you need to accomplish these steps. Log into the new user account and then start the command to encrypt the target user.
~$ sudo ecryptfs-migrate-home -u user
Provide the password of the target user account. The user account is now encrypted and it will show information saying
- You must log in as the other user account immediately – before a reboot!
- A copy of your original home directory was made. You can restore the backup directory if you lose access to your files.
- You should generate and record a recovery phrase.
- You should encrypt your swap partition, too.
Important!
Log out and log back in as your original/target user account. Do not reboot the system before logging back in since you need to record the passphrase that is created by the system.
You will be met with an information notice explaining that a passphrase was generated for you and to record it. Click on the option to run the action.
You can run ecryptfs-unwrap-passphrase command to view this passphrase any time.
After verifying everything is working properly, after two reboots, you can now clean up the back up of the home folder. If you navigate to /home/, the user account name and a copy of the user account are in the directory. Delete the copy which is not encrypted.